 uarkova
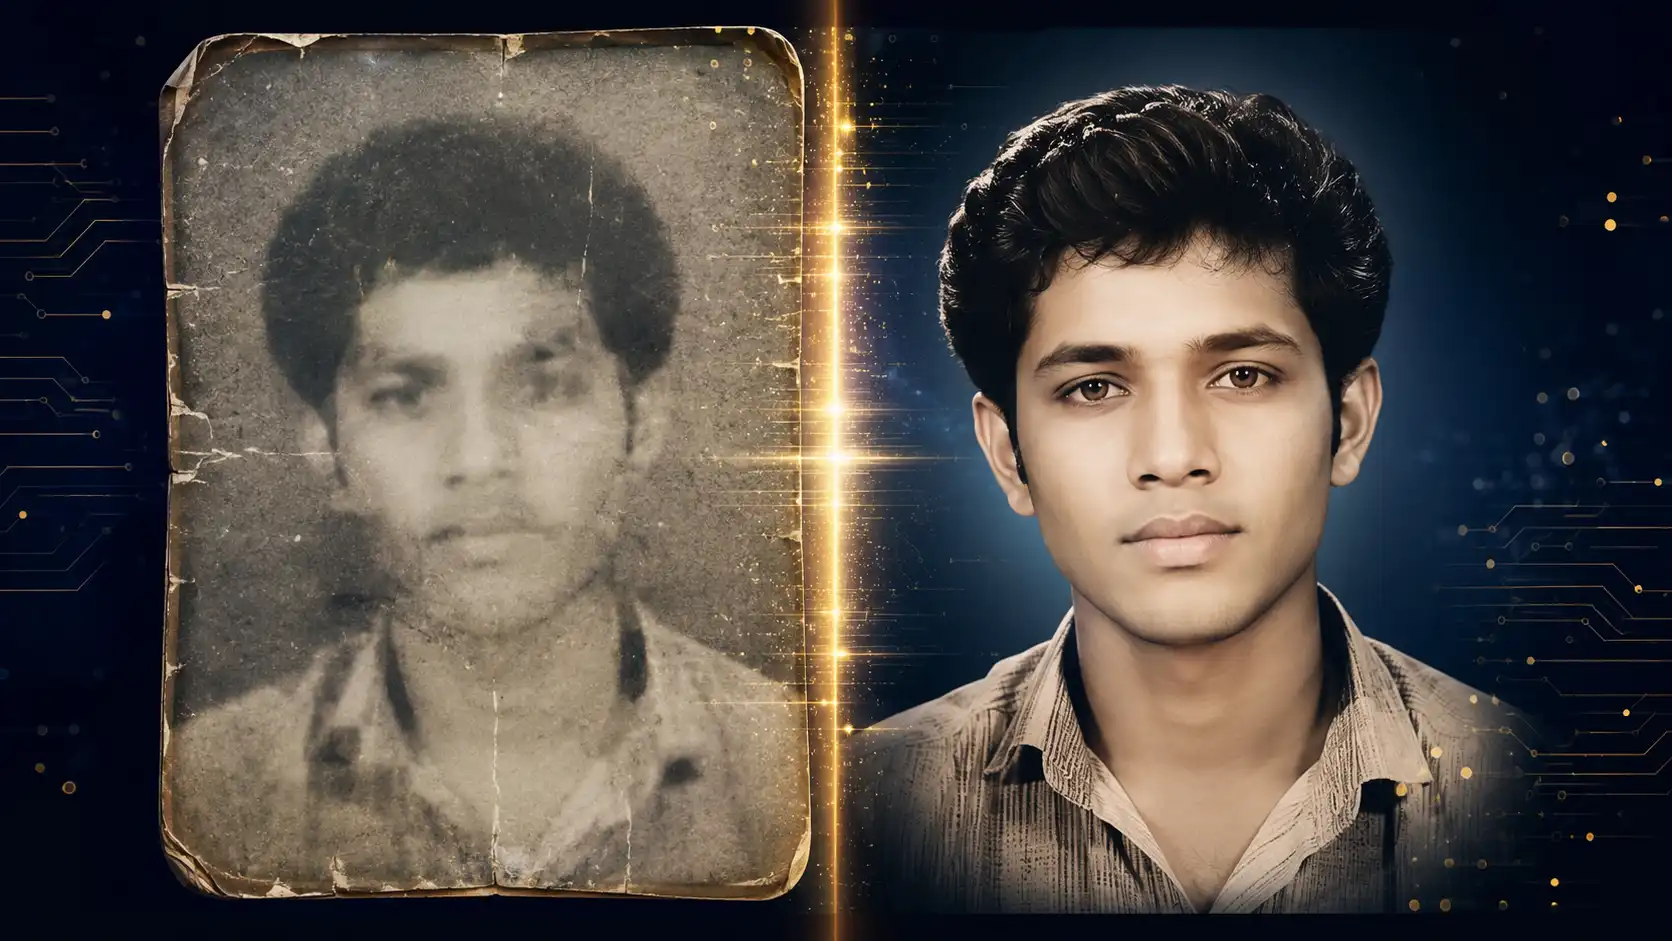
Best AI Prompt for Photo Enhancement 2026: Turn Low-Quality Photos into 8K Ultra HD
Best AI Prompt for Photo Enhancement: Turn Low-Quality Photos into 8K Ultra HD
Old family photographs, blurry scans, low-resolution social media uploads, and compressed WhatsApp images all share the same frustrating problem — lost detail. Thankfully, modern generative AI models can now restore and enhance images to near-DSLR quality, but only if you know how to prompt them correctly. In this guide, we break down one of the most effective AI photo enhancement prompts available today, explain exactly what each instruction does, and show you how to get museum-quality, ultra-realistic results without distorting a single detail of your original photo.
Why Most AI Photo Enhancers Fail
The biggest complaint people have with AI upscaling tools is simple: the AI "fixes" the photo by quietly changing it. Faces get subtly reshaped, skin gets overly smoothed into a plastic texture, eyes get recolored, and backgrounds get invented. For casual use this might be acceptable, but for professional headshots, family archives, legal documents, or e-commerce product photography, any unauthorized alteration is a dealbreaker.
The solution is a prompt that draws a hard line between enhancement and alteration — improving resolution, clarity, and lighting balance while explicitly forbidding the model from inventing new content.
The Complete AI Photo Restoration Prompt
Below is the exact prompt structure that professional photo editors and AI enthusiasts are using in 2026 to enhance low-quality images while keeping 100% fidelity to the original:
Breaking Down Why Each Section Works
1. Identity and Structure Lock
The opening instructions explicitly protect facial structure, expression, pose, hairstyle, and camera perspective. This prevents the common AI mistake of "beautifying" a face — smoothing wrinkles that were part of the person's real appearance, changing eye shape, or subtly altering bone structure. For restoring photos of deceased relatives or historical figures, this is the single most important line in the entire prompt.
2. The "Do Not" Guardrails
Negative instructions matter as much as positive ones. Telling the model not to add, remove, or replace objects, logos, or background elements stops it from hallucinating new details in blurry or damaged areas — a common failure mode in older upscaling tools that tended to invent texture where none existed.
3. Texture and Micro-Detail Recovery
This section targets the technical side of enhancement: fabric weave, individual hair strands, skin pores, and eye clarity. These are the details that separate a flat, low-resolution photo from one that looks like it was shot on professional equipment.
4. Camera and Lens Simulation
Referencing specific camera systems like Sony Alpha or Canon EOS flagship bodies gives the model a concrete visual target for lighting falloff, bokeh rendering, and lens sharpness — essentially "coaching" the AI toward a known aesthetic rather than a generic smoothing filter.
5. Colour Fidelity Instructions
The final section is critical for restoration work: it tells the model to match the original white balance and mood rather than applying trendy, oversaturated color grading. This keeps vintage photos looking authentically vintage rather than artificially modern.
Best Use Cases for This Prompt
- Family photo restoration — repairing old, faded, or low-resolution scanned photographs
- Professional headshots — sharpening phone-camera portraits for LinkedIn or resumes
- E-commerce product photography — enhancing product shots without altering the actual product
- Social media content — recovering detail from compressed or downscaled images
- Real estate photography — improving lighting and clarity in interior/exterior shots
- Archival and historical images — restoring detail while preserving historical accuracy
Tips for Getting the Best Results
- Start with the highest resolution source you have. AI enhancement recovers detail; it can't recover information that was never captured.
- Use good, even lighting when photographing physical prints before uploading, to avoid glare that AI might misinterpret as texture.
- Review the output carefully. Even with strict guardrails, always compare the enhanced image against the original to confirm identity and detail accuracy.
- Avoid stacking enhancements. Running the same image through multiple AI tools repeatedly can introduce compounding artifacts.
- Specify format needs upfront if you require a particular aspect ratio, print size, or file type.
Ultra-realistic professional photo restoration and enhancement. Enhance this exact uploaded image to true 8K ultra-high resolution while preserving 100% of the original identity, facial structure, expression, pose, hairstyle, skin details, clothing, background, framing, lighting direction, composition, and camera perspective. DO NOT add, remove, replace, or modify any object, person, accessory, text, logo, or background element. DO NOT beautify, reshape, or AI-generate new facial features. Maintain the exact image content. Improve only: • Natural sharpness • Ultra-fine skin and fabric texture • Hair strand details • Eye clarity • Realistic pores and micro details • Edge refinement • Noise reduction • Compression artifact removal • Dynamic range recovery • Accurate exposure balancing • Natural HDR effect • Professional colour correction • Intelligent colour grading matched to the original image • Realistic contrast • Lens clarity • High-end DSLR / Sony Alpha / Canon EOS flagship camera quality • Premium optical lens rendering • Cinematic yet natural look Keep all colours faithful to the uploaded image. Match the original white balance and atmosphere. Do not oversaturate or change the mood. Output should look like it was captured using a professional full-frame camera with an expensive prime lens under perfect lighting, while remaining completely faithful to the original photograph. Photorealistic, ultra-detailed, true-to-life, museum-quality, natural skin tones, zero hallucination, zero content alteration, maximum realism, authentic detail preservation, pristine 8K master quality.
Frequently Asked Questions
Does this prompt work with any AI image model?
Most modern image-generation and editing models that support image-to-image transformation can interpret this prompt, though results vary by model. Always check that your chosen tool supports uploaded image editing rather than pure text-to-image generation.
Will this prompt fix severely damaged or torn photos?
It can improve clarity and reduce noise, but severe physical damage (large tears, missing sections) may still require dedicated restoration tools or manual editing alongside AI enhancement.
Can I use this for commercial photography?
Yes, many photographers use similar prompts to enhance client photos. However, always check the terms of service of the specific AI platform you're using regarding commercial usage rights.
Does true 8K resolution get generated even from a low-resolution source?
The AI upscales and adds plausible fine detail to reach higher resolutions, but the result is an enhanced interpretation rather than genuinely recovered original data. Manage expectations accordingly, especially for print use.
Final Thoughts
The difference between a mediocre AI photo enhancement and a genuinely professional result almost always comes down to the prompt. By explicitly locking identity and content while only unlocking technical improvements — sharpness, texture, dynamic range, and color accuracy — this prompt structure gives you the control that generic "enhance my photo" requests simply can't match. Whether you're restoring a decades-old family portrait or polishing a product photo for an online store, a well-structured prompt is the difference between AI enhancement you can trust and AI enhancement that quietly rewrites your memories.